OVERVIEW
Creating an appointment in OfficeTools WorkSpace allows for placing items on the schedule(s) of a staff member or multiple staff member’s calendars.
USER GUIDE
To create a new appointment, navigate to the “Schedule” tab
![]()
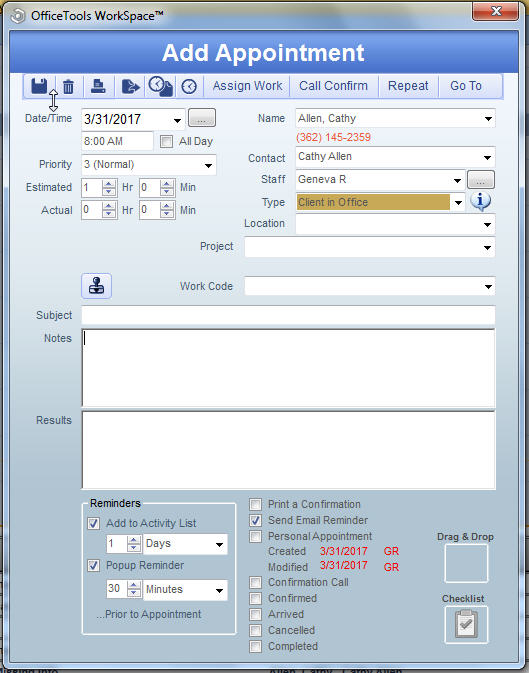
- Click the “+” icon on the top toolbar or simply double-click the time slot on the appropriate calendar
- Fill in the appointment details and select the features required for that specific appointment (i.e., repeat, send email reminder, priority level, etc.)
- Click the save icon to save the appointment

When creating appointments it is important to remember all of your options for said appointments. For example, WorkSpace allows for automated text message reminders as well as email reminders for the appointments that are created. WorkSpace also offers the option to attach documents through the Drag & Drop feature as well as associate the appointment directly to pre-existing projects that exist for that contact.
RELATED GUIDES
FREQUENTLY ASKED QUESTIONS
- Is there any way for me to see all appointments I have had with a contact in the past?
- Can I add my To-Do’s and Calls to my calendar like I can in Outlook?
- How would I check for upcoming appointments?
- I have a bunch of old appointments I want to mark completed, can I mark them all at once?
- Can I have my calendar on screen all the time but still work within WorkSpace?
- Can I view other staff member’s calendars?