OVERVIEW
WorkSpace Portal allows you to deliver invoices and accept payments through our secure portal technology. This guide will show you how to upload invoices and configure your billing options.
USER GUIDE
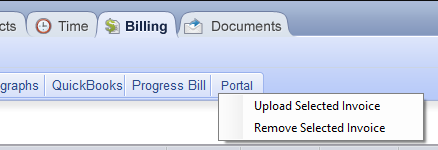
To upload invoices for a client, go to the Invoices tab > Billing section. You will see a Portal button in the toolbar. Click on this, and you will have options to either “Upload Selected Invoice” or “Remove Selected Invoice.”

Using “Upload Selected Invoice” will send the invoice to your portal and generate a Portal Reminder to send to your client. If you have mistakenly uploaded an invoice, you can remove it from the portal by using “Remove Selected Invoice.”
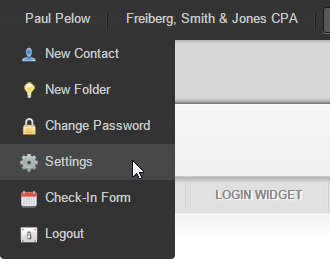
In order for your clients to pay for their invoices on the portal, you will need to add your billing service’s credentials to your WorkSpace Portal settings. Log in to the portal website (www.officetoolsportal.com) with your credentials, hover over your staff name, and select Settings.

Next, select the “Billing” tab.

Here, you can enter the credentials from your billing service. WorkSpace Portal currently supports PayPal, Authorize.net, GoEmerchant, and Google Checkout. When your client makes a payment on the portal, your billing service will send you a receipt for the payment. Use this receipt to enter the payment in WorkSpace.